send email with attachment in PowerApps
PowerApps send email with attachment
- Suppose in PowerApps, you want to send an important document or file while sending an email to a specific person. In this case, you can use the Attachment option (By default) that has been provided by the Office365 Outlook connection.
- You can send an email with a single attachment file or multiple attachment files in PowerApps.
- Also, if you are interested to know more details about the PowerApps send Email with attachment, then you can refer from this below link:
PowerApps Email Attachment Control – How to Use
PowerApps send email on submit
In this below example, We will see how we can send an email on the Submit button in PowerApps. For this, we will use Power Automate. This means the flow will trigger from the PowerApps itself bypassing the dynamic values. Follow these below steps to do so:
- I have a SharePoint list named PowerApps Email that contains these below three fields as shown below.

- Create a Powerapps app from the SharePoint list itself. Once you will create the app, there will be three screens available in the app (Browse screen, Details screen, and Edit screen).
- Go to the Edit screen, the screen will appear with these below fields.
- Insert a Button and set its Text property to Send Email.
- Now its time to add the Powerapps Flow. Select the Button (Send Email) -> go to the View tab -> Power Automate -> + Create a new flow.

- When you will click on to create a new flow, the flow template page will appear. Select the template named Click a button in PowerApps to send an email.

- In the next page, Click on the Continue button as like below.

- Once you will click on the continue, the below flow will appear. In the template, you can see bydefault the actions and values has been added automatically. So no need to do anything. If you want to rename the flow, then rename it and then save the flow.

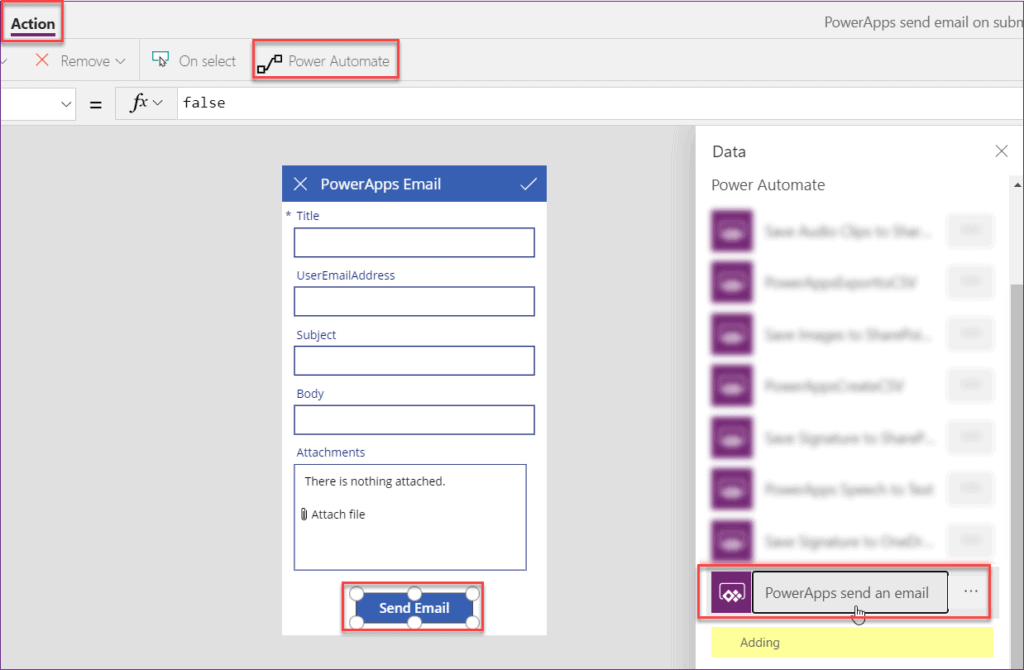
- Next, come back to the PowerApps app. Select the Button (Send Email) and add the flow. To add the flow, go to Action -> Power Automate -> Click on the flow name (PowerApps send an email). Then the flow will be added to the selected button.

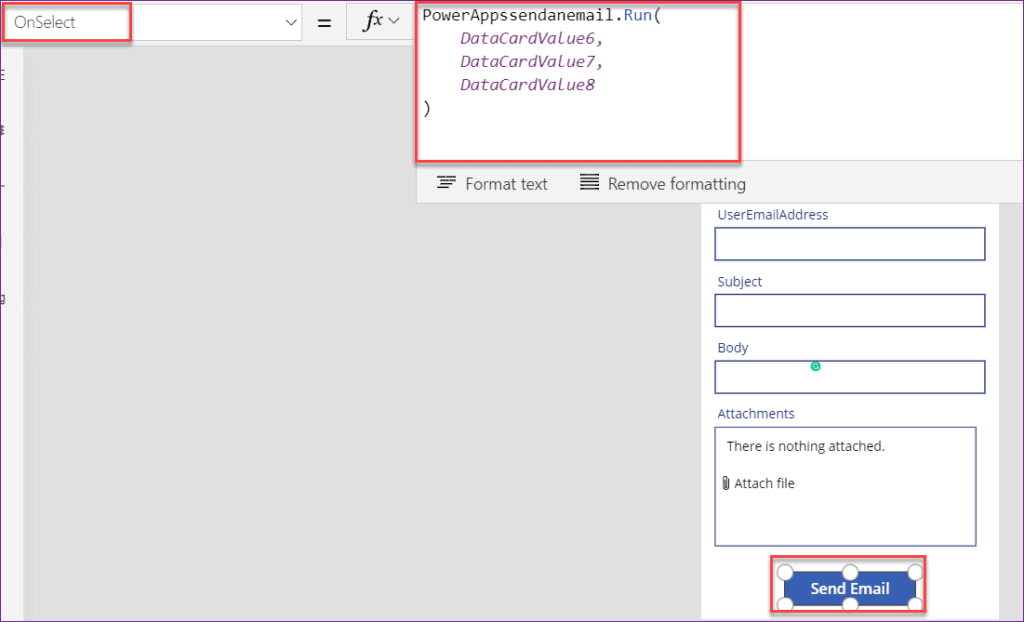
- After adding the flow on the button, it will appear with PowerAppssendanemail.Run() on its OnSelect property. Now, you need to apply the below formula as:
OnSelect = PowerAppssendanemail.Run(
    DataCardValue6,
    DataCardValue7,
    DataCardValue8
)
Where,
- PowerAppssendanemail = Flow name
- DataCardValue6 = User Email Address field Data card value
- DataCardValue7 = Subject field Data card value
- DataCardValue8 = Body field Data card value

- Save and Preview the app. Enter the fields with dynamic values and then press the button (Send Email) to send the email.
- Once you will check your Outlook, then you have received with a new mail in your mail box as like below.

Comments
Post a Comment